 Building BEA Portal with HelloWorld Portlet
BEA Portal - part 2 of 2 - BEA Weblogic Portal 10.3, may 2010
This text assumes you have successfully completed building and deploying
the HelloWorld Portlet from the previous article.
The PortletHelloWorldEAR project will be central in the following. All
subsequent work will take place with the BEA Weblogic Administation Portal tools.
No further programing required at this point - only BEA Portal configuraion.
Before using the WebLogic Administration Portal tools,
you must ensure that the server is started. This is either done from the
command line - or from within Eclipse.
This is also described detailed in the BEA WebLogic Portal 10.3 Documentation found on
BEA's e-e-docs web site:
http://download.oracle.com/docs/cd/E13218_01/wlp/docs102/index.html .
See the Getting Started with Portal Administration guide
for instructions on starting a WebLogic Server and the WebLogic
Administration Portal.
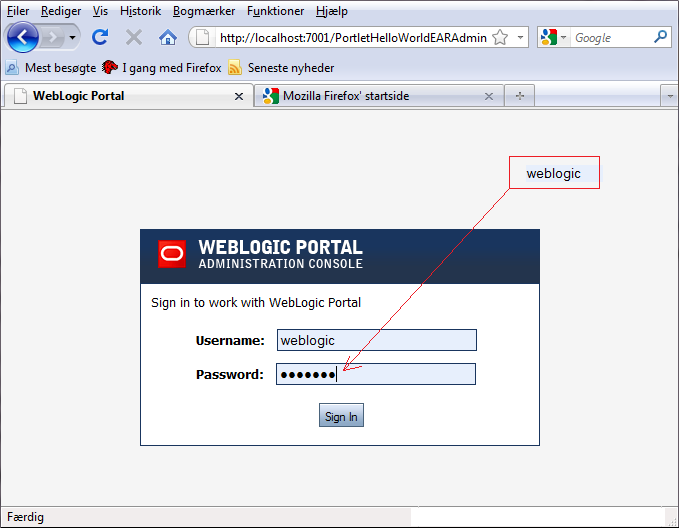
Starting the WebLogic Administration Portal
is done by opening a browser and enter the following URL:
http://:/Admin
where is the name if your portal application.
For example, in this specific case, the default URL
is: http://localhost:7001/PortletHelloWorldEARAdmin
Use your standard administrator credential to log onto the portal. In
this specific case is used Username : weblogic and
Password : weblogic.
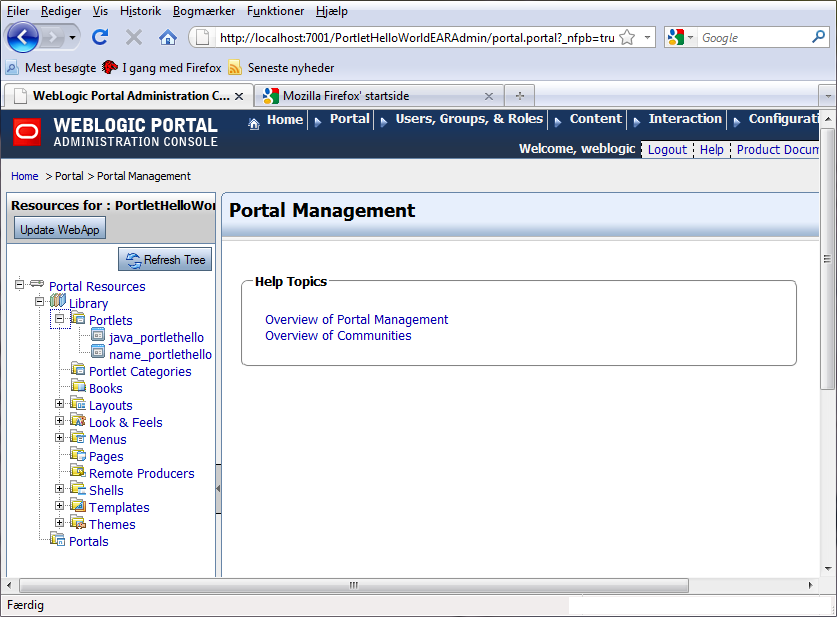
This will open the BEA Weblogic Portal administration console.
It follows a layout somewhat similar to the traditional BEA Server console.
Under sub-categories can be found an expandable tree structure for
the different Portal components.
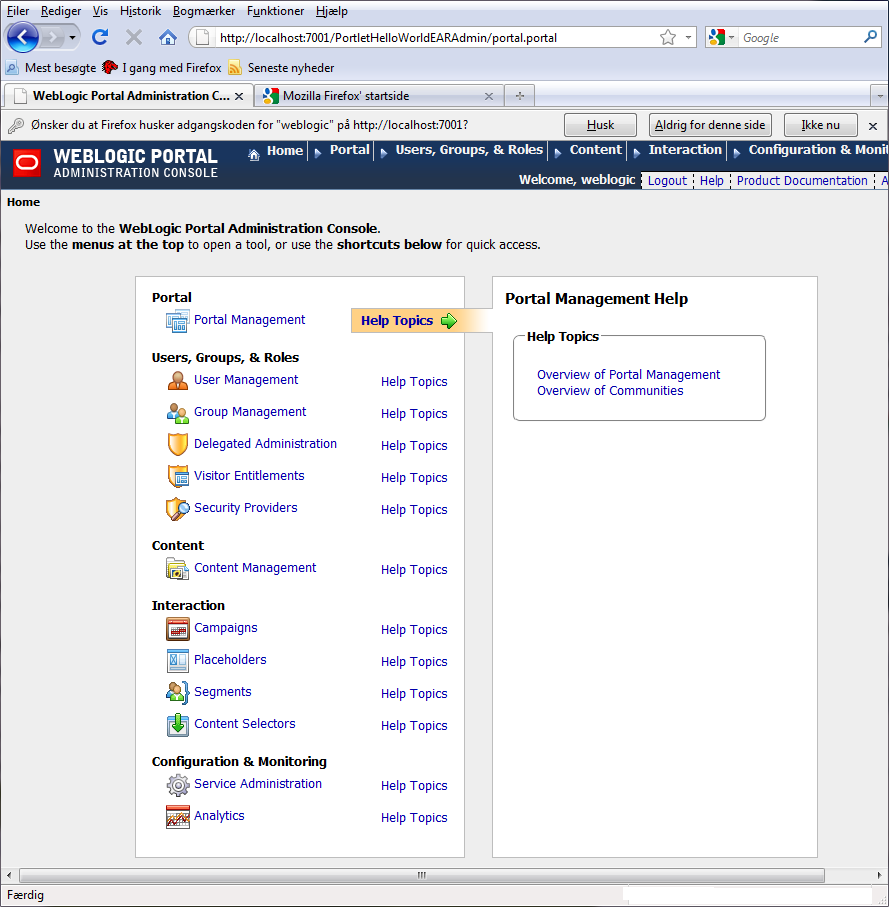
At this initial point, you basicly have :
- portlet not being put to use anywhere
- no portal configured to show any contents
Proceed to change this by following link Portal Management diretly
under the first section Portal. This should subsequently
open the BEA Portal configuration screen.
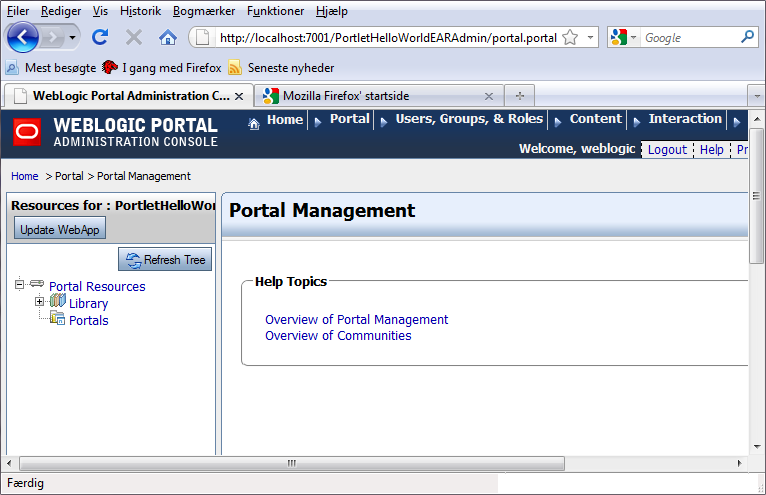
Expanding the structures will reveal the deployed HelloWorld portlet.
At the end of the list will be found the Portals configuration part
for a new portal.
Portal is an organised representation of a Web site,
offering a single-point-of-access to applications and site contents.
Multiple portals may be hosted within a single WebLogic Portal server. Each
configured Portal is differentiated by a partial URL defined during setup.
For end users, the portal is presented as a Web site with pages
organized by tabs or other types of navigation. The organisation is
Portal -> Booklet -> Pages. A page has nested sub-pages, or one or more
portlets-individual windows, which will display either static
HTML content or more complex Web services.
A page can contain multiple
portlets, giving users access to different information and tools
in a single place.
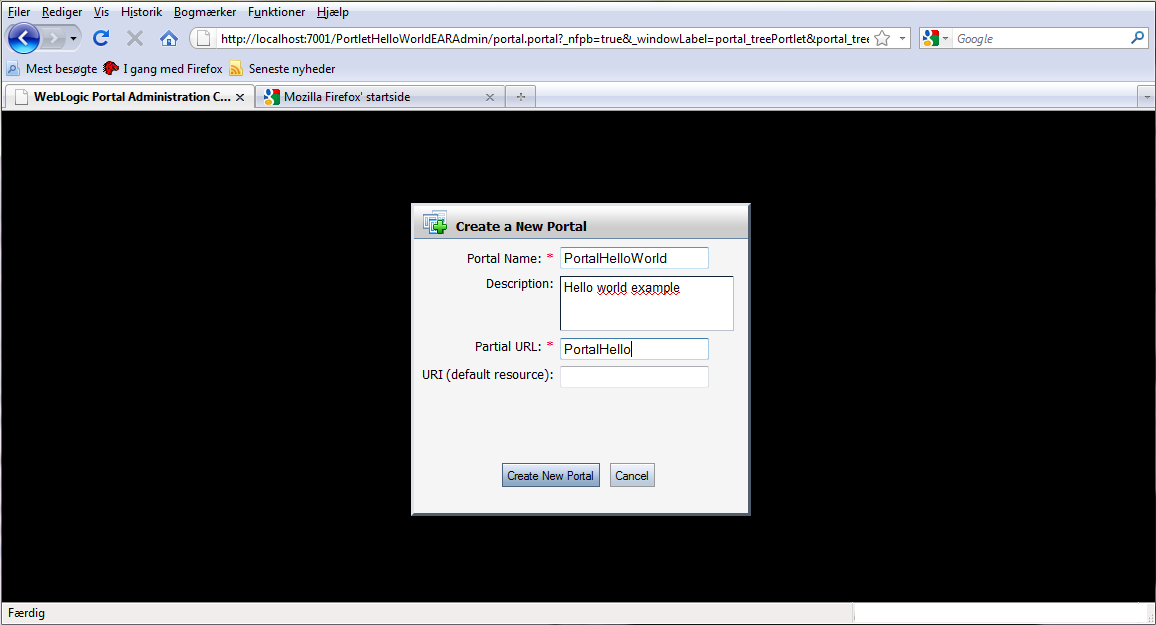
Proceed to click on Portals in the Portal Resources tree,
and click on Create New Portal.

Enter a Name for the Portal and a partial URL. Proceed to
click on Create New Portal to save your new portal.
The partial URL will be part of the URLs,
used for portal views.
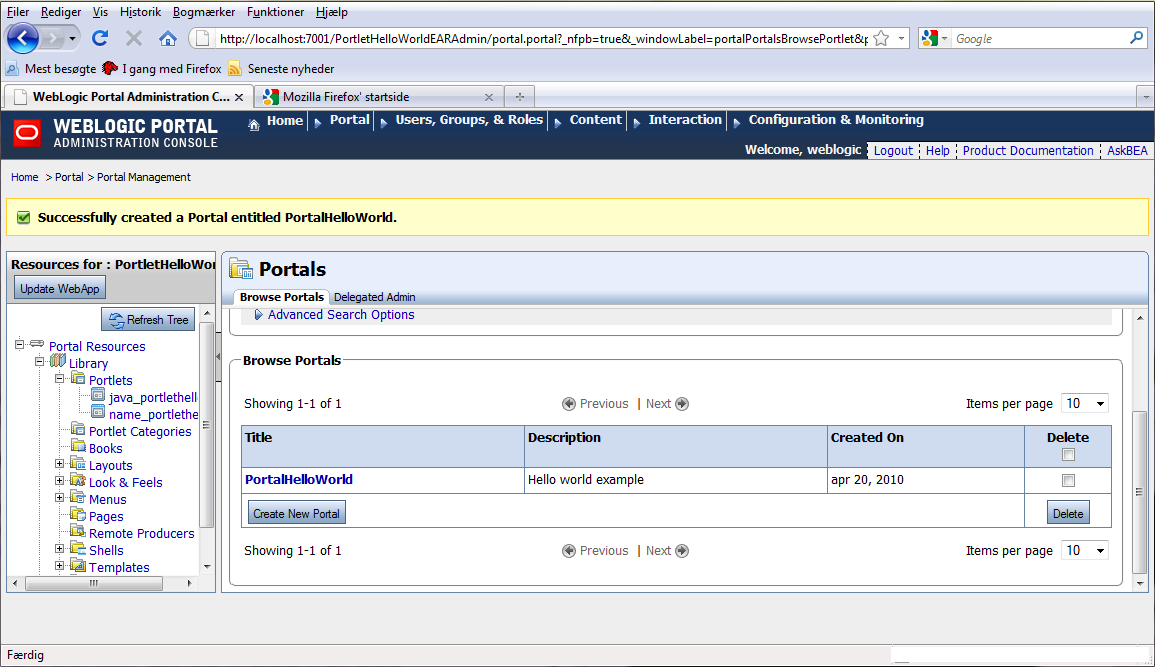
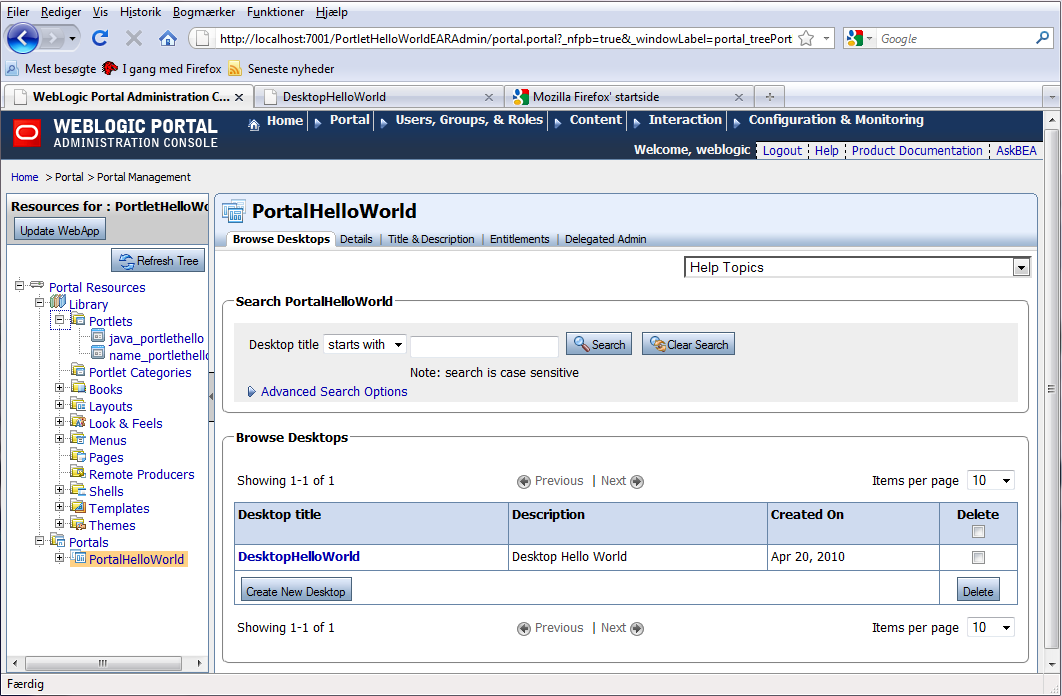
Having successfully created a Portal, proceed to either click
on the title link PortalHelloWorld or expand the bottom node Portals -> PortalHelloWorld
in the tree at the left column Resouces for PortletHelloworldWeb.
But for a moment, let's reflect on what a Desktop really is.
A Desktop is an audience specific view of portal components.
It contains the portal header, footer, and body. The body
contains the actual portal contents: books, pages, portlets, and look
and feel elements. A portal can support 1,..* desktops.
The desktop is the view of the portal accessed by end-users,
once having been prepared by a portal administrator, setting
entitlements on the desktop and making it ready for public use.
Users may furthermore configure their own views through customization of the
desktop. A desktop represent a user view of a Web site or a
portal, displaynig a different set of information or tools based
on user context. Fx, each department in an organization
(HR/Human Resources, Accounting, Sales, Support) can define a portal
desktop containing their own portlets, navigation, and look and
feel, and still these desktops are all supported by a single portal definition.
A Desktop is the basicly the end-user representation of the Web site.
Proceed to click on the link PortalHelloWorld
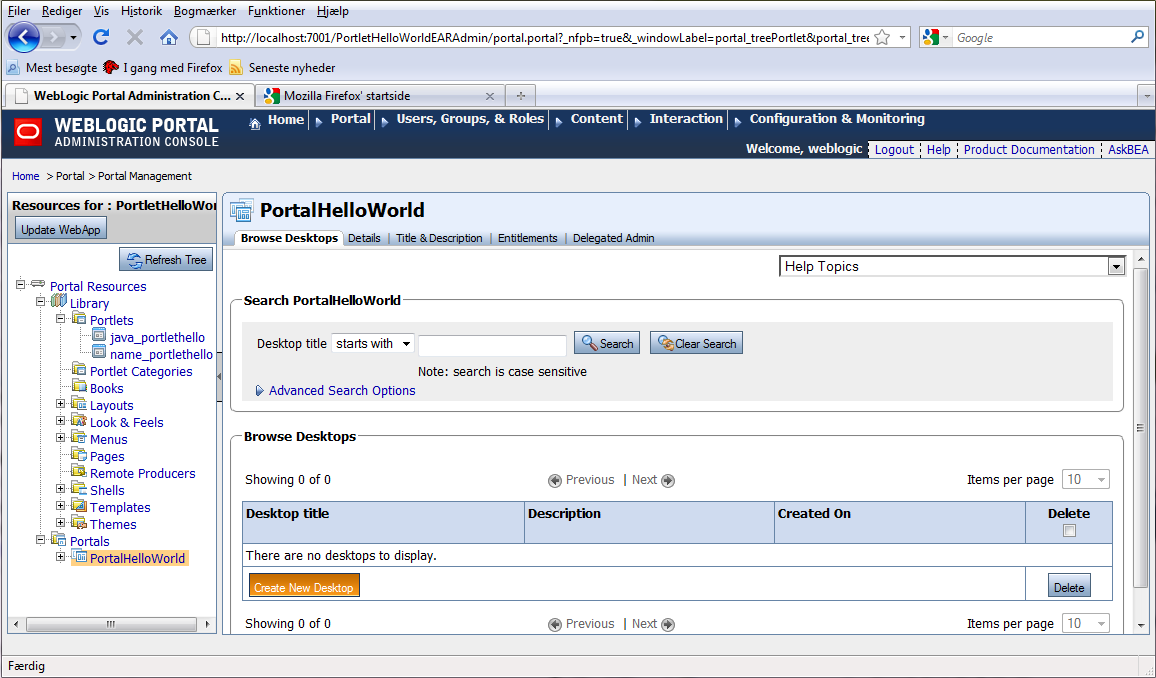
Having opened the Desktop configuration view, proceed to create
a new Desktop. Click Create New Desktop. Subsequently the Desktop configuration view should open.
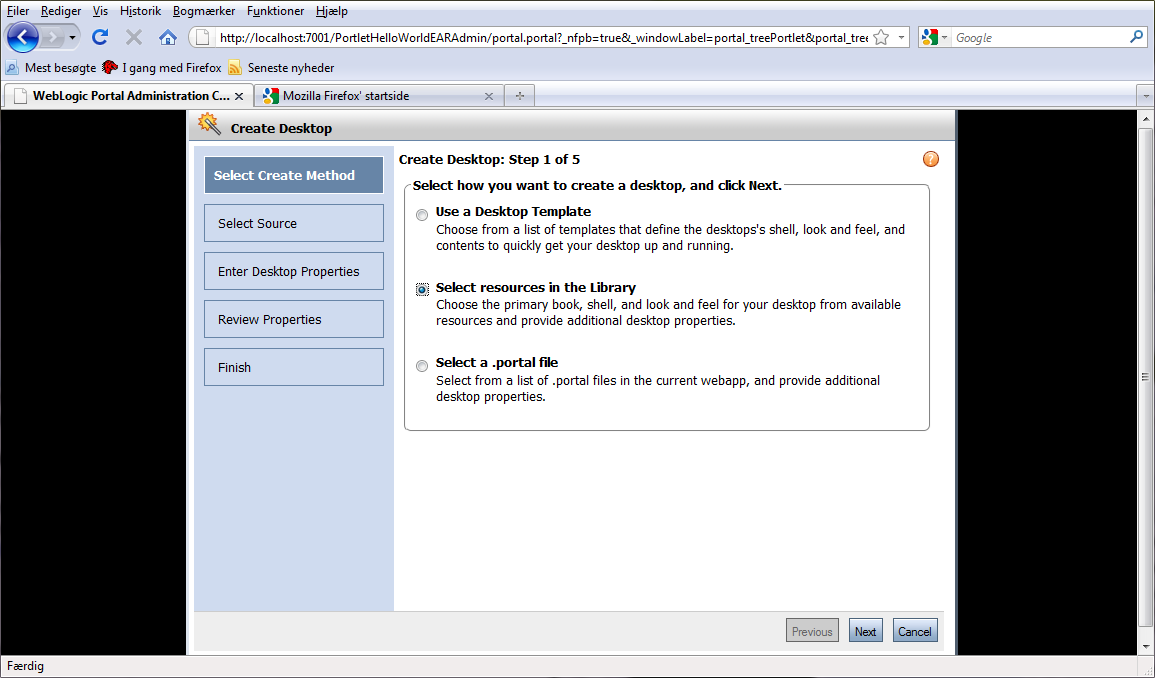
This configures the Desktop. It is possible to use a Template
(actually not available at the current point with a fresh installed BEA Portal
Sever), Library ressources or a .portal file (which is also
not available unless we make one for this example). An simple configuration
solution would be to choose the Library ressource.
What we are currently trying to do is to define :
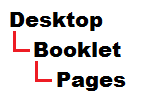
Which is a simplified version of a potential more complex Hierarchical structure of a portal desktop
which is described in the traditional BEA documentation, and basicly follows
outline :
Book or Booklet... is basicly a component acting as a
high-level wrapper providing content organization and navigation.
Books may contains pages
or other books, providing possibility fir for hierarchical nesting of pages and
content. Books are identified by a control such as a tab set.
Page.. contains the portlets that make up the actual portal content.
Pages can also contain books and other pages. Pages are identified by
a control such as a tab set.
Layout and Placeholder. Layout is an (HTML) table incorporated
in a page to position the physical locations of portlets.
Various layouts are available for pages to Administrators and users.
Layout contains placeholders. Placeholders are individual cells in a
layout, where portlet components are placed. Placeholders are displayed
in the Edit Contents pane for the BookHelloPage in this example.
Proceed with Select resources in the Library and press Next.
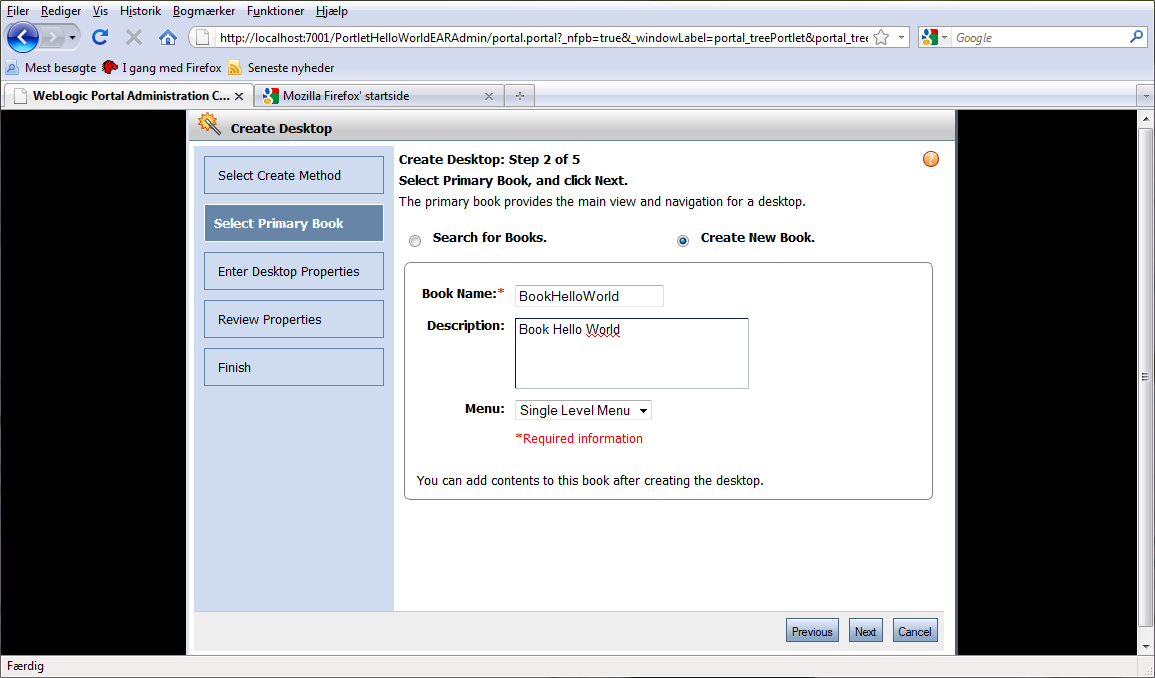
Enter a Book Name associated with the desktop and a Menu type. Press Next.
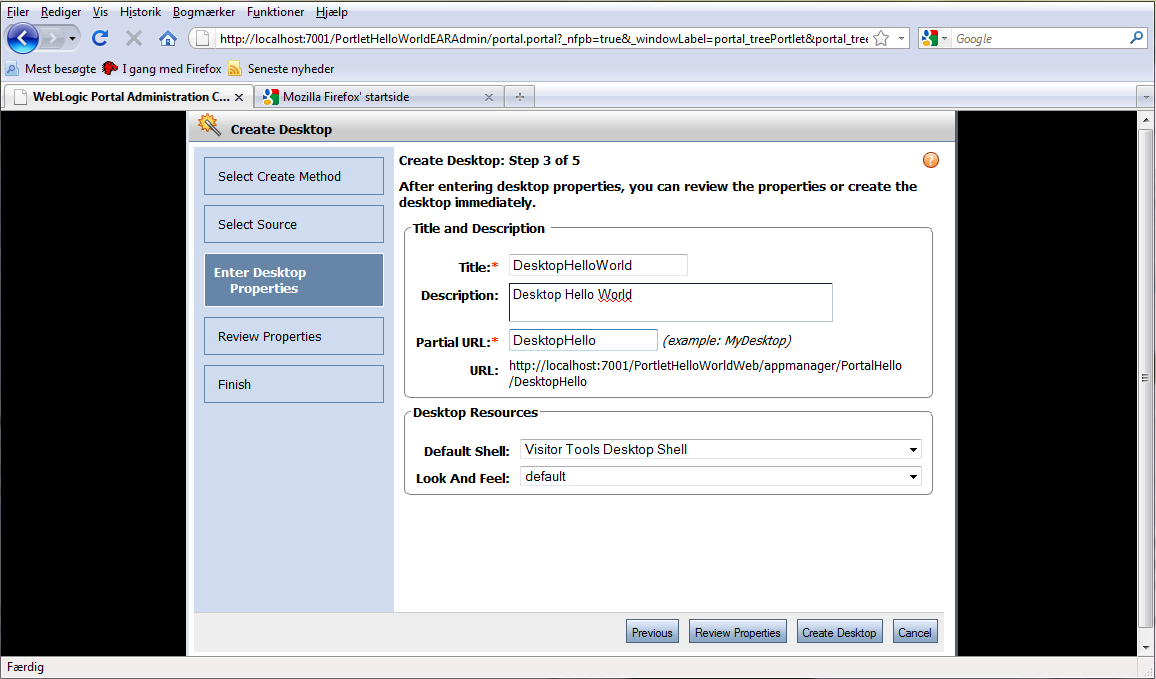
Enter a Title name for the desktop, a Partial URL, and select a Default Shell and a Look and Feel. Click Create Desktop to create your new desktop.
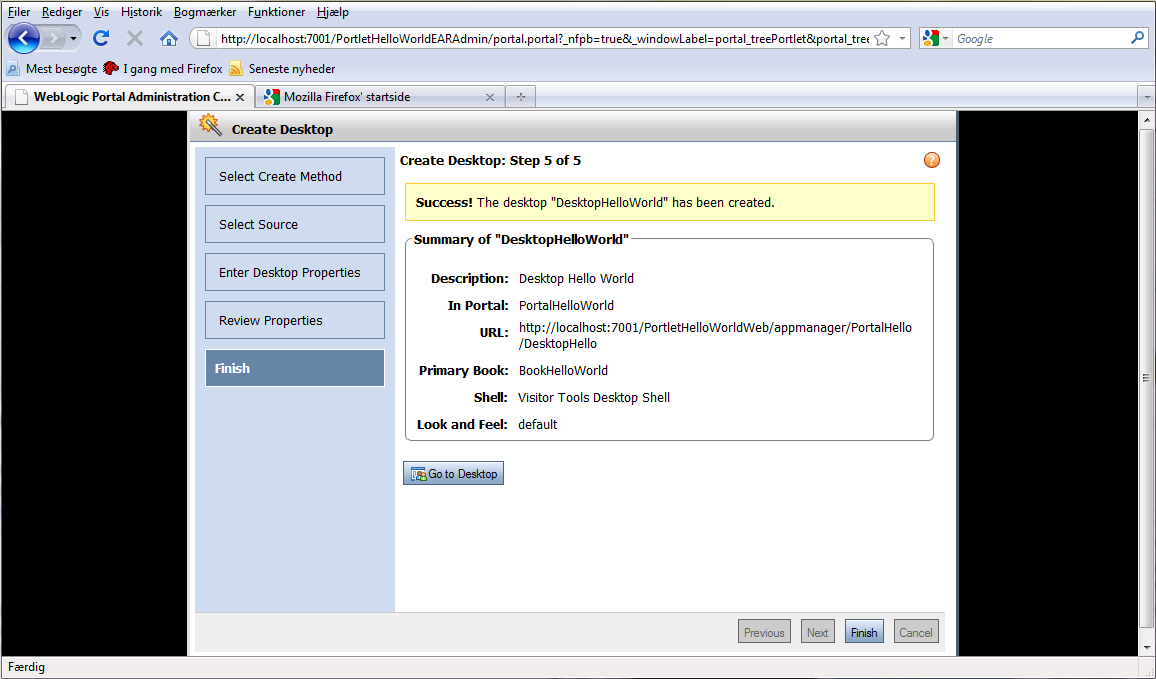
Conclude the desktop creation by pressing Finish.
Proceed to expand the DesktopHelloWorld in the menu to the left
and set focus on BookHelloWorld. Having created desktop, it is time to
expand on the contents of the BookHelloWorld by adding a page.
With focus on BookHelloWorld inspect the tabbing pane Details and
fin finally select the neighbour tabbing pane Browse Contents.
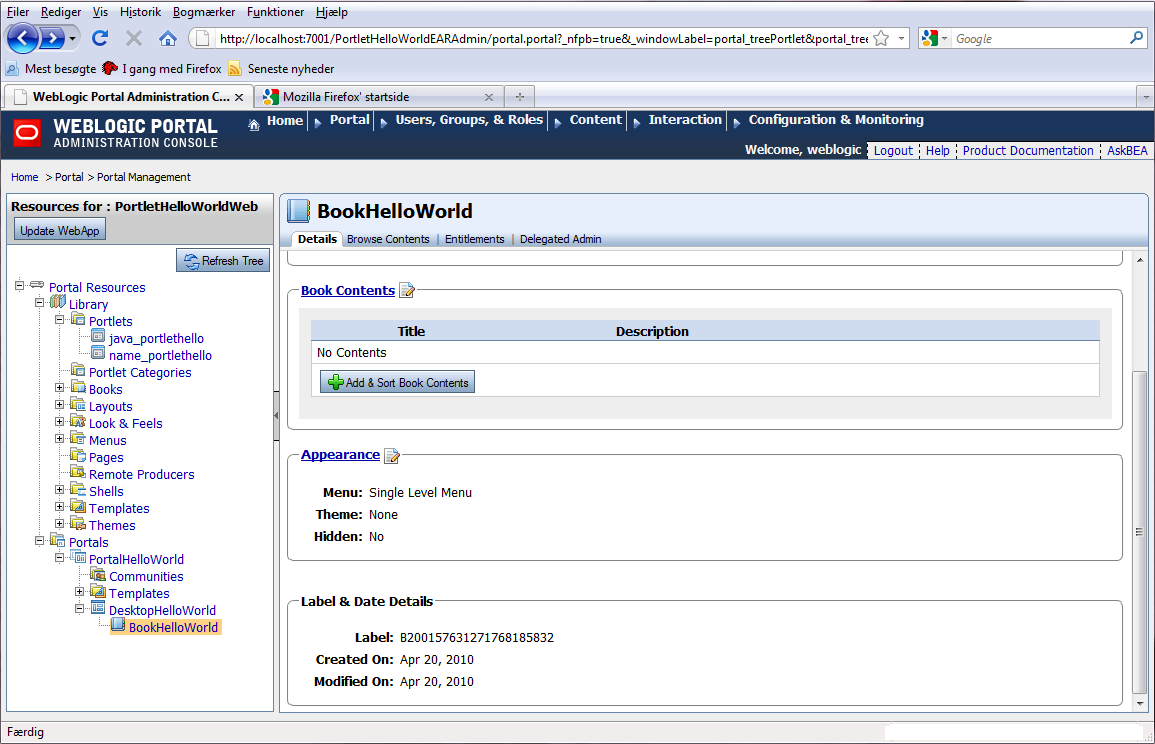
Proceed with the link Book Contents.
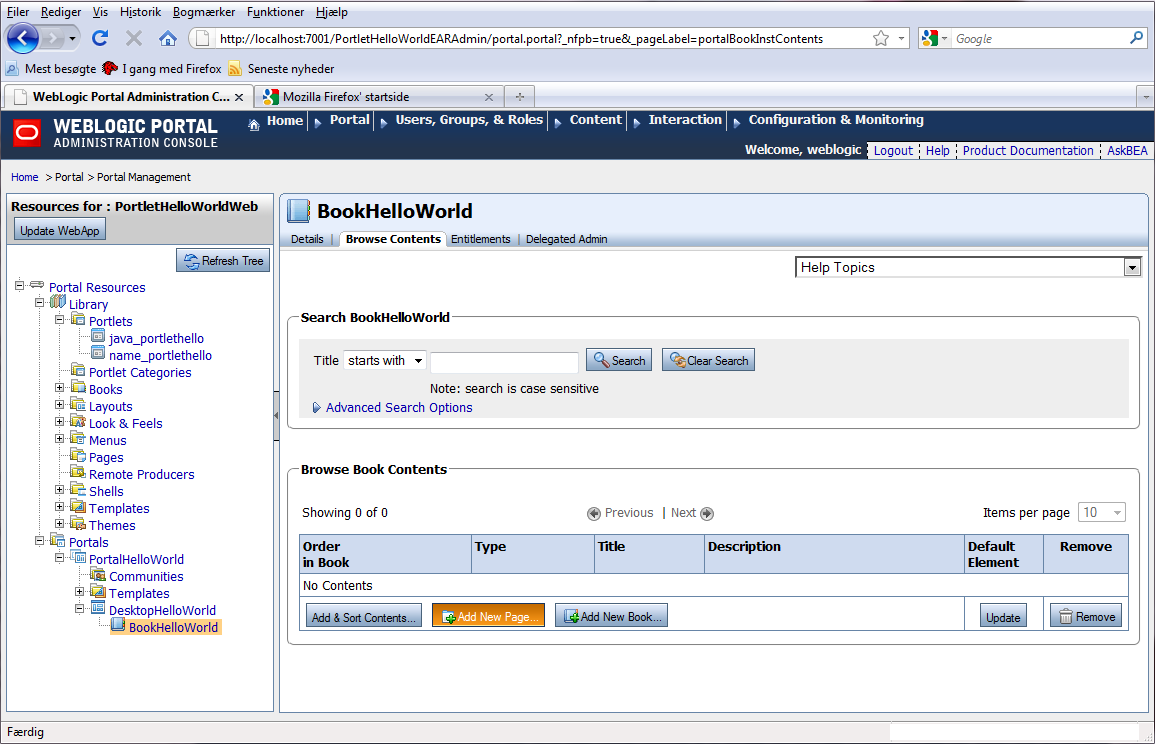
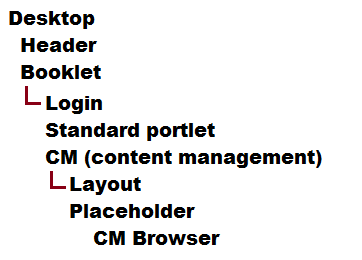
Proceed to Add New Page.
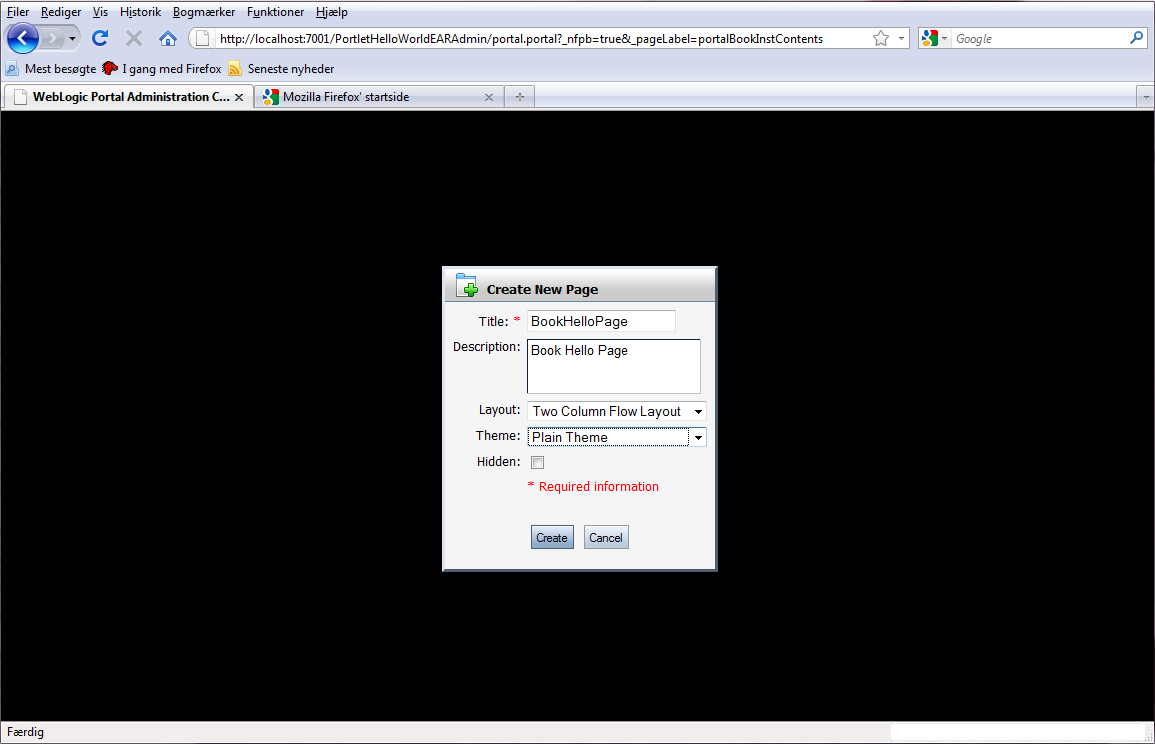
Proceed to enter New Page Title, Layout and Theme. Press Create to complete adding the new page.
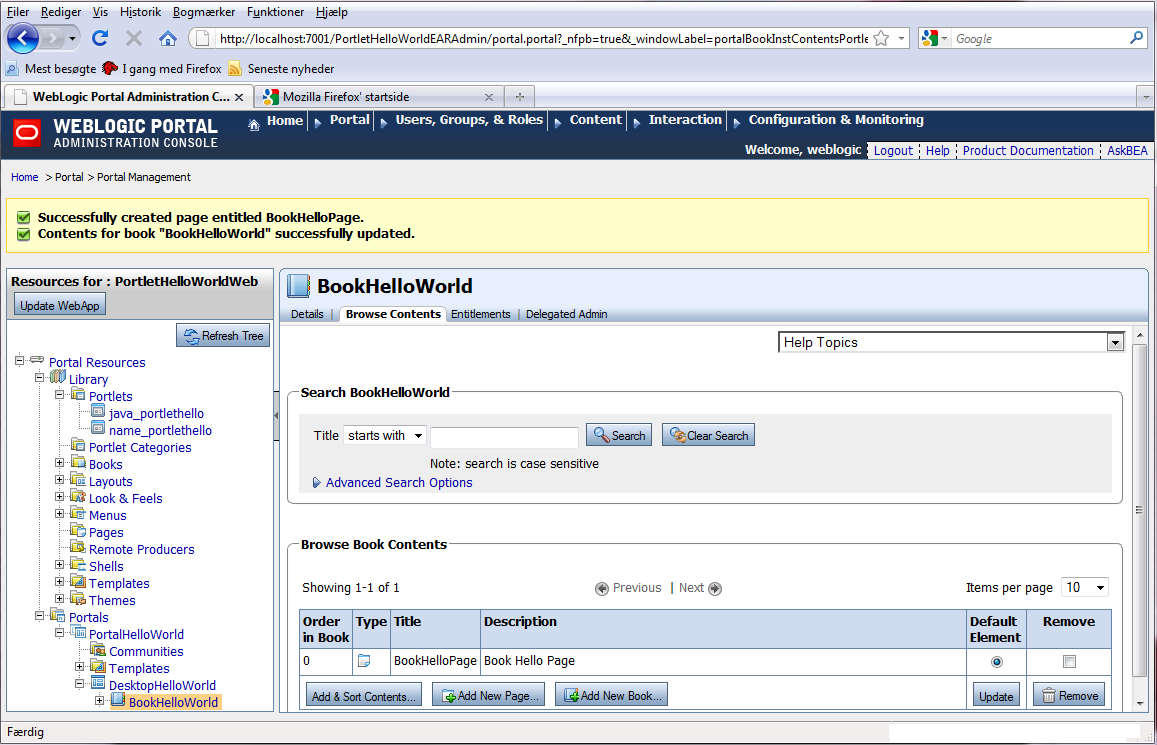
Proceed to browse the newly added page. Expand BookHelloWorld in the
resources list to the left. Click on BookHelloPage to inspect details.
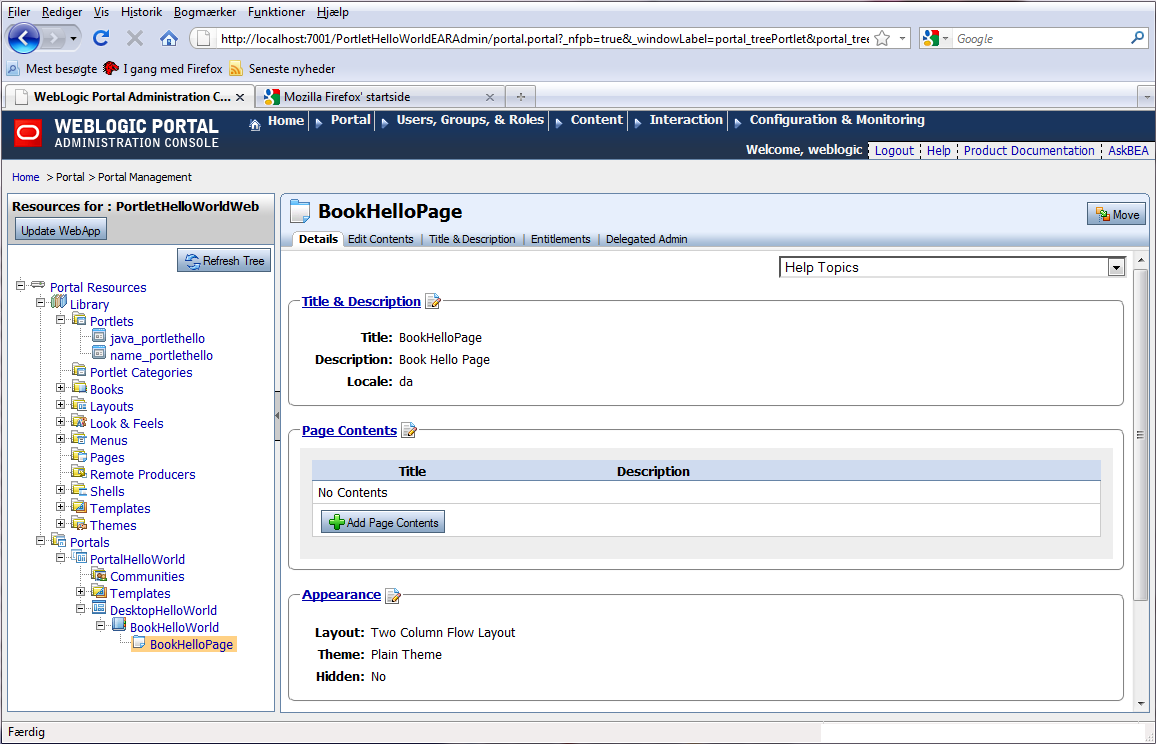
Click on the link Page Contents for ability to edit contents.
Actually this is the same as selecting the tabbing pane Edit Contents
but obviously there are multiple links leading in the same direction.
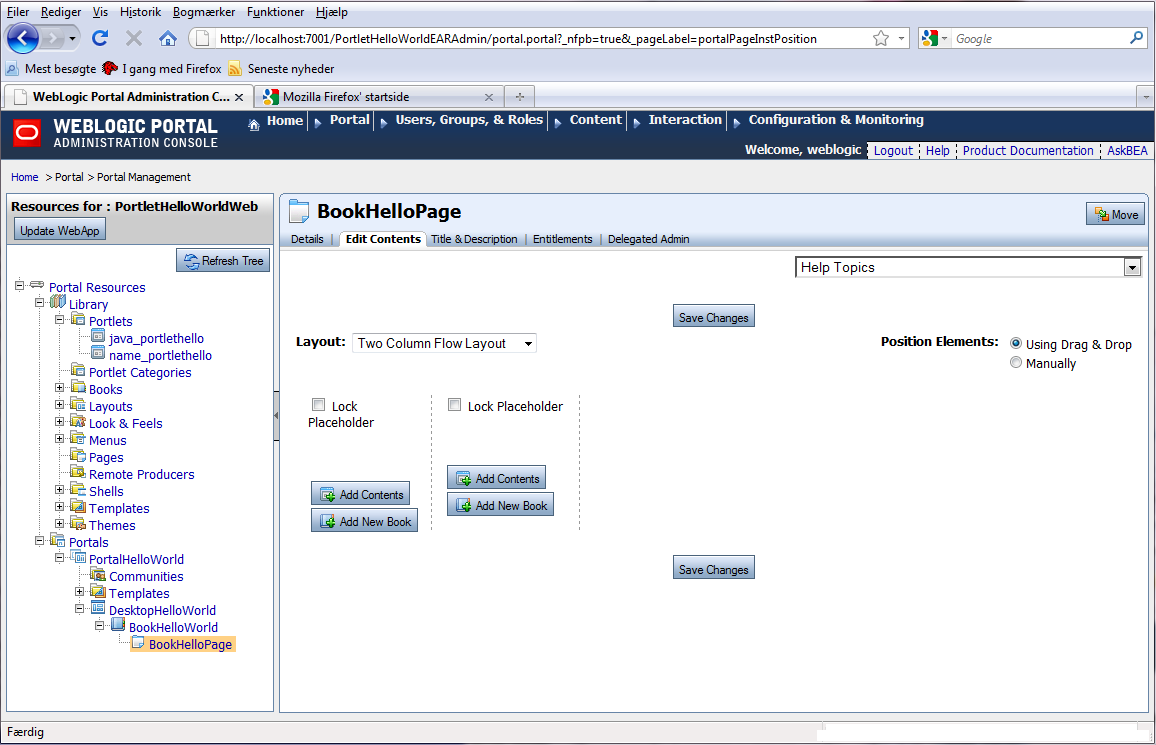
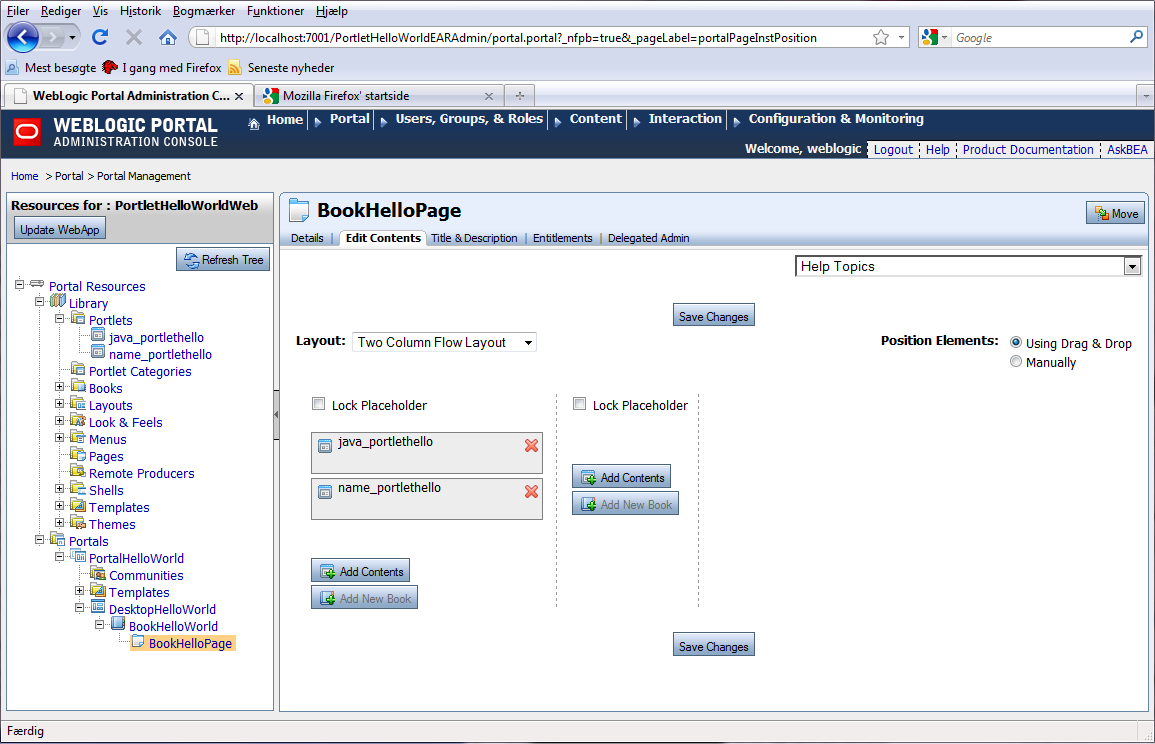
Once in the Edit Contents view of BookHelloPage,
a decision is made to position the HelloWorldPortlet in the leftmost column.
To add the HelloWorldPortlet to the page, proceed to press button
Add Contents.
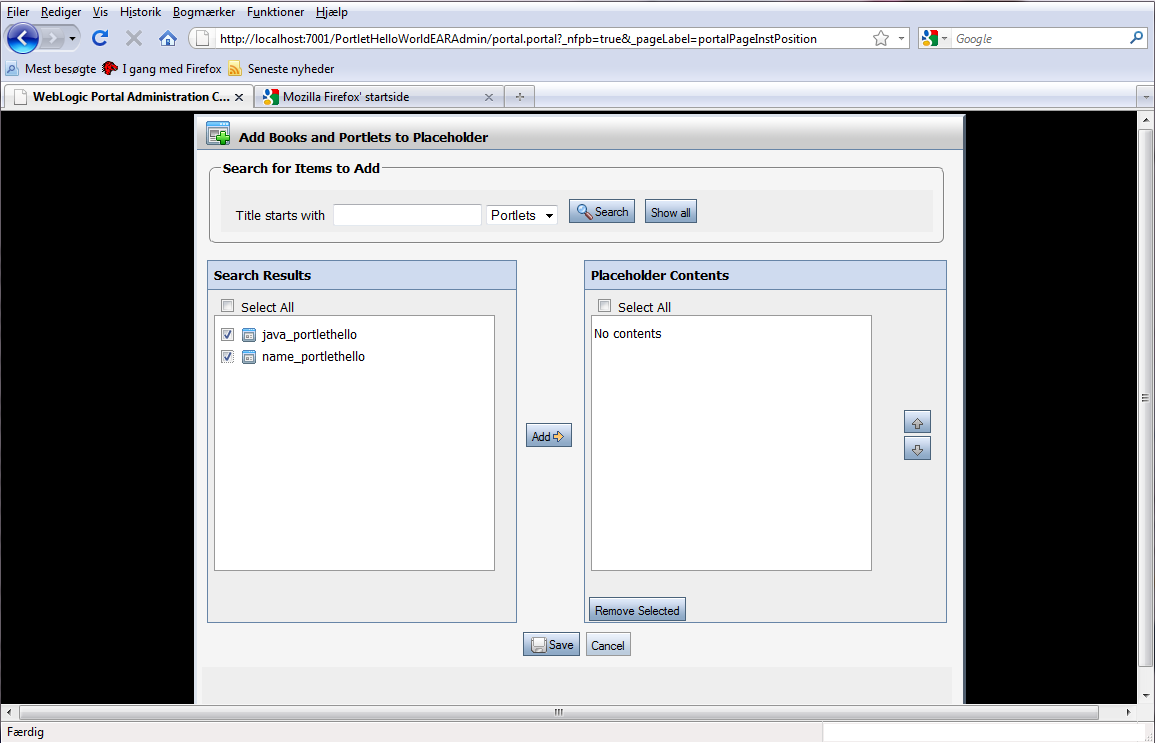
Check the select boxes for the HelloWorldPortlet identified by title and name
assigned to it previously in Eclipse. Press Add in order to move them
to the Placeholder Contents
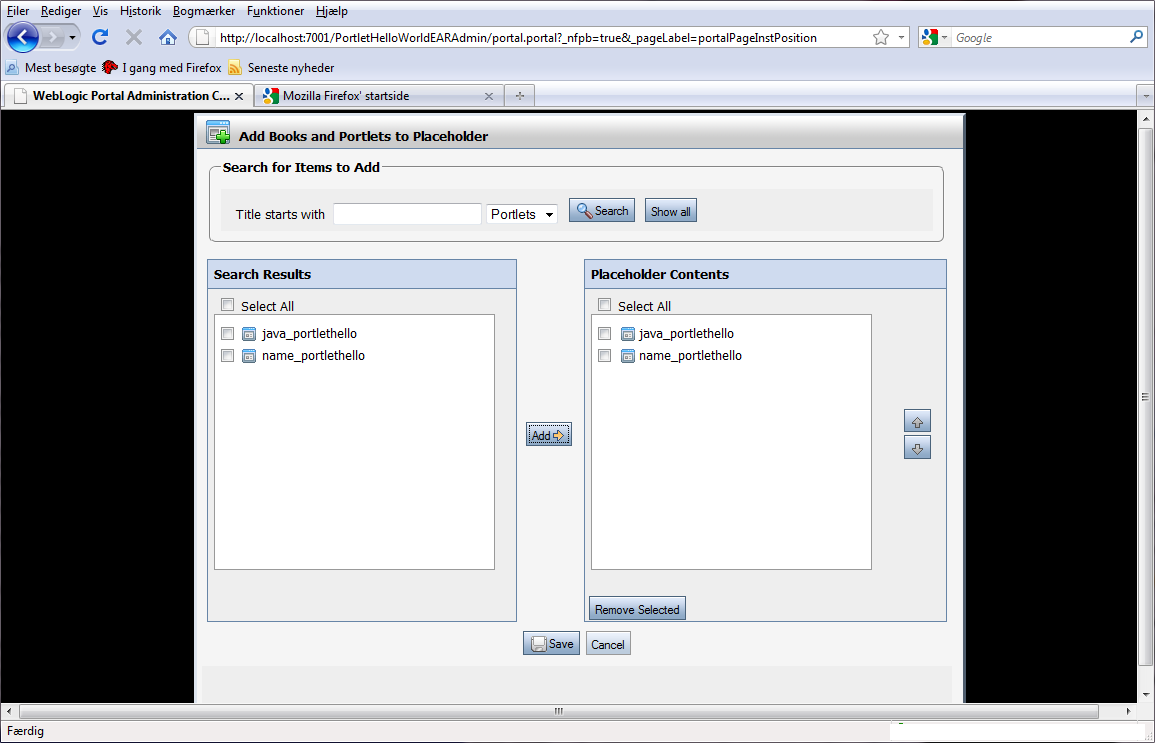
Proceed with button Save to add the Portlet to the Portal page.
This will bring us back the the page layout view, where the Portlet should
now be included in the layout.
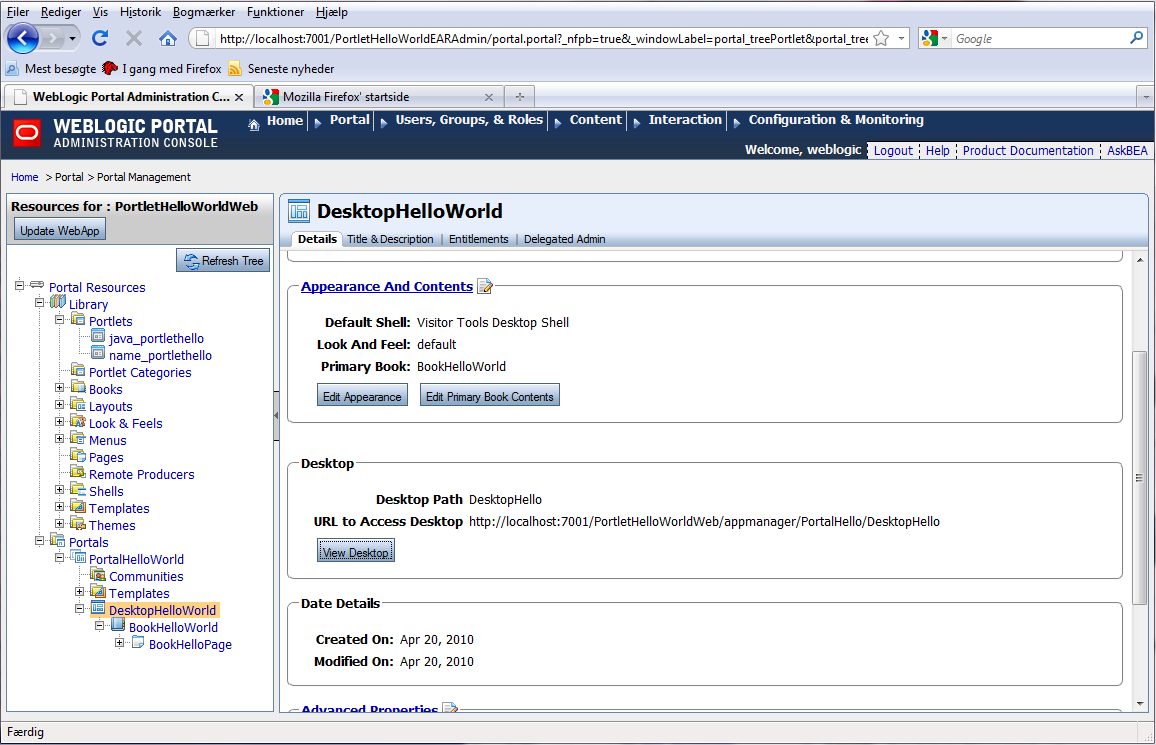
Proceed back to the DesktopHelloWorld to view desktop details.
Here you will find an option to preview the desktop with the button View Desktop.
Try it.
The HelloWorldPortlet now becomes visible on the Portal.
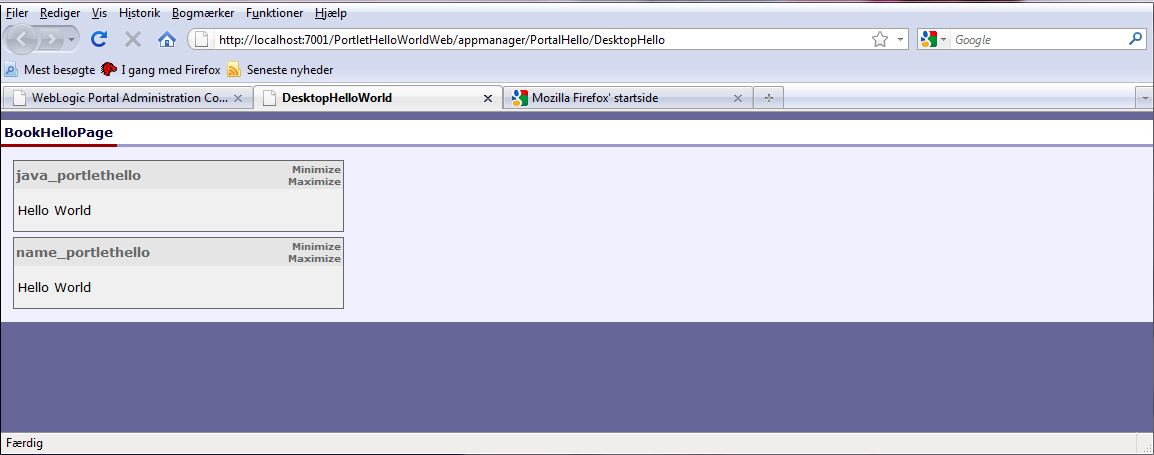
This concludes Portal Hello World build and deployment session here.